Free Download Fring Application for Symbian and Android

Free Download Fring Application for Symbian and AndroidFring application is an application to access social networking sites via mobile phone devices. The news latest said that Fring has update the new version for Symbian and Android. with the new features of Fring, here are the benefits to Symbian users:
- Very easily to change the status
- Use a * and # can be done on the features in the Fring application dialer
- New display Twitter 2.0, making it easier to use
- Display a chat menu

Except for Symbian users, the latest Fring application can also be used for Android users. New version of Fring application includes voice, connectivity and stability improvements in addition. And the below are the latest features to Fring application for Android users:
- Hiding and showing friends who are offline
- Hide and reveal your book contact address
- Privacy settings for IM and signature mood message
- Improved audio problems at Motorola Droid and Milestone
- Support for Google Nexus One, repair bug and more

Fring application is very good like Blackberry Paypal and Blackberry Yahoo Finance. Fring application can be downloaded for free. For download Fring application for Symbian and Android, please click www.fring.com/download.

Free Download Yahoo Finance to Blackberry

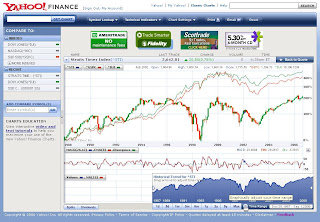
Free Download Yahoo Finance to BlackberryYahoo Finance is the leading internet business services. With Yahoo Finance services, we can get the latest economic news. If we are always mobile, the Yahoo Finance services can be read on the Blackberry. In This time, Yahoo Finance services in the Blackberry is only available in UK.

Hopefully in some time later will be available in many languages. Besides getting the latest economic news, with the Blackberry Yahoo Finance application we can perform a variety of other features such as:
  • Exchange various currencies
  • Financial new aggregator
  • Statistics
  • Real time data and after market analysis
  • View our Yahoo Finance portfolio, and more
The application of Yahoo Finance can we downloaded for free on our Blackberry. Yahoo finance applications available for all types of Blackberry. For free download Yahooo Finance application for Blackberry, please click here.

Free download Paypal applications on Blackberry

Free download Paypal applications on BlackberryPaypal, one of the leading payment services on the internet announcing that applications created for the transaction through the Blackberry have been finished and can be downloaded for free.

This service is similar with internet banking that was popular a few years before. With this application, the Blackberry users can be quickly send money to whoever he wants, as well as check balances and payment history.

The most fun for us, the Paypal service can be downloaded for free. Although free, this service can be enjoyed Blackberry users in Canada, United States, United Kingdom, France, Italy, Spain, Holland, Germany, Belgium, Luxembourg, Ireland, Portugal and Australia. We hope in the future time will increase again.

If your Blackberry user and want to immediately activate the paypal application, please click here. I hope the information about the free download Blackberry application from paypal can be useful for us.

Nexus One is Favorites Gadget Steve Wozniak (Apple founder)

Steve Wozniak (Apple founder)SAN FRANCISCO - Who would have thought Steve Wozniak, Apple cofounder Steve Jobs but now even making phone made by Google's Nexus One, as the current choice. This was revealed Wozniak in an interview with NBC television network.

"The latest, and not a product developed by Apple, just out yesterday," Wozniak said when asked about his favorite gadgets such as the Telegraph quoted the site, Friday (15/1/2010). The answer refers to the Nexus One. In addition, he also has a Motorola Droid are also both working with the Android platform.

However, instead of praised Android platform. He admitted that he had to use Android-based smartphone since the first version came out but not satisfied. "I have some Android phone, which earlier did not satisfy me. Droid and Nexus One, including a great phone, but do not apply to all Android," he said.

In fact, Wozniak said hundreds of types of smartphones have a variety of brands including Motorola VIP phone from the 1990s that are not sold freely on the market. Surely, he promised to buy every new gadget that caught his attention. Wozniak claimed to have tried to make the BlackBerry as the main gadgets for everyday activities. However, again he was not too happy.

"Sometimes I bring a Droid at the waist and also Nexus One. At a certain moment I took my BlackBerry. The main phone I kept the iPhone," said Wozniak. Not only one iPhone will have but two.

When asked where the gadget is best thought there was not the best. According to him, it all depends on consumers' needs and abilities. Wozniak had even criticized the initial version of the iPhone does not support 3G, is not open to the developers, and often put to hack his iPhone itself in order to run various applications.

Changing Windows Standard Fonts

There are several standard fonts used by Windows, the Arial and MS Sans Serif. Tahoma font used on the shell to Explorer in Windows, while the system default font such as the System Properties, Device Manager and other applications is MS Sans Serif.

Want to change these fonts? The way is not as easy as changing the font in Microsoft Word document. But, if you're already accustomed to playing with the registry, do not hard, really.
  1. Click "Start> Run ...", then type" regedt32.exe ".
  2. Go to the subkey "HKEY_LOCAL_MACHINE-SOFTWARE-Microsoft-Windows NT-CurrentVersion-FontSubstitutes".
  3. Double-click String Value MS Shell Dlg "to change the default font of the previous system using Microsoft Sans Serif.
  4. Change the Value Data it with another font type you want, provided that fonts are already installed on your Windows.
  5. Click "OK".
  6. Double-click to "String Value MS Shell Dlg 2".
  7. Change shell before using the font Arial with font type, such as Arial or Comic Sans MS. The rules remain the same as before, ie you define the font must have been installed in the operating system.
  8. Click "OK", then close the Registry Editor and restart the PC.
After you restart your computer, Windows will use the new font you have set for the font in the shell or in the system.

Do not forget, do a registry backup before you try this trick so you can return to the previous settings with ease. To manually system restore, went back to the subkey "HKEY_LOCAL_MACHINE-SOFTWARE-Microsoft-Windows NT-CurrentVersion-FontSubstitutes" in the registry, and then return the "Value Data MS Shell Dlg" Microsoft Sans Serif and "MS Shell Dlg 2" in Tahoma.

Modifications Microsoft Word Shortcut

Modifications Microsoft Word ShortcutIf you click the icon [Open] or [Save] on the toolbar of Microsoft Word, comes the dialog window. In the middle, you can browse the disk to determine the location of the file. On the right side there is a preview of the document will be opened, while on the left side there is a shortcut to the Desktop, My Documents, History, Favorites, and Web Folders. Presence of a shortcut that allows us to quickly access a particular location.

Unfortunately, documents to be saved or opened are not in the places of his shortcuts are done. Just delete the existing shortcut and replace it with a shortcut to the folder that is frequently used.

You can remove the shortcut through the registry like this:
  1. Run the Registry Editor.
  2. Go to KEY_CURRENT_USER key sub-Software-Microsoft-Office-9.0 Common-Open-Find-Places-StandardPlaces. Inside are five keys, ie Desktop, Favorites, My Document, Publishing, and Recent. Key that create the shortcut on the windows "Open / Save" on your Microsoft Word. Key Desktop, Favorites, and My Documents refers to the shortcut Desktop, Favorites, and My Documents, while referring to the key shortcut Publishing Web Folders, and refer to key shortcut Recent History.
  3. Say you want to remove the Web Folders shortcut. Go to the key Publishing. double-click the DWORD value named [Show], changing its value data to "0".
  4. Now try to open Microsoft Word and click the icon [Open] or [Save]. Supposedly, the Web folder shortcut is not there. To eliminate the other shortcuts, you can do so on other key key in accordance with the shortcut that you want to remove.
If you had been able to eliminate unnecessary shortcuts, so now let's learn to create their own shortcut that will refer to realize favorit.Untuk folder, open the Registry Editor again and follow these steps.
  1. Go to sub key HKEY_CURRENT_USER-Software-Microsoft-Office-9.0-Common-Open-Find-Places.
  2. Create a new key with the name "UserDefinedPlaces".
  3. In it create another key with the name, eg "shortcut1".
  4. Shortcut1 key in the string value is created with the name "Name", and fill its data value with the name of your choice. This name will appear on the Open or Save the window in Microsoft Word.
  5. Then create a string value again and this time give it the name "Path". Fill in the value of his data with the full address of the folder you want to create shortcut it.
  6. Try again to open the windows Open / Save, and the shortcut you made earlier will be seen there.
You can make your favorite shortcut is more than one. Need to be aware, however, a maximum of only five shortcuts that can appear on the windows Open / Save, already includes the standard shortcut from Microsft Word. So if you want to make a favorite shortcut, you must remove one of the standard keyboard shortcuts Microsoft Word. If you want to make more than one, of course you also have to remove the default shortcuts Word more than one.

Modifications in the Shortcut Menu Context

You'll never find an application that includes the application shortcut in the context menu. Look at Winamp or Windows Media Player. They deliberately put the shortcut in the context menu so that access to a program so more quickly.

How do I create a shortcut like that? Well put on a registry.

Here's steps:
  1. Open the Registry Editor by typing "regedit" in the Start menu.
  2. Go to the sub key "HKEY_CLASSES_ROOT-*- shell".
  3. Right-click on the directory of the shell, then, from the context menu, select "New" followed by "Key". A new directory will be created and you can change the name as you wish. The name of this directory which will be shown when the context menu is displayed. Suppose the directory name of "entertainment".
  4. In the same way, create a new directory in the directory of entertainment. Give the name "Command" to this new directory. Click the directory "Command", then double click the name of binary data (default) located on the right. After the box "Edit String" appears, the contents of the location (Path) complete the application and the application name, format, and "% 1". Code "% 1" it is optional and serves to run the application automatically. Suppose the location is filled with C:-Program Files-Winamp-winamp.exe "% 1".
  5. Now it's time to reap results. Appropriate application example above, try right-clicking on the file with the MP3 format. Shortcut entertainment will be displayed in the context menu. Click on the shortcut and MP3 files that you select will be played.
To remove the context menu you just created, you can simply return to the sub key "HKEY_CLASSES_ROOT-*- shell", then delete all the keys you've ever made.

Delete the applications that do not want to be removed

If you often try a free application, you must have experienced that the application is still listed in the list of Add or Remove Programs when you've removed from the system. Now, instead of struggling to install other applications to clean it, wash it out through the Registry Editor.

It's very easy.
  1. Open the Registry Editor window, then find the location "HKEY_LOCAL_MACHINE-SOFTWARE-Microsoft-Windows-CurrentVersion-Uninstall". This directory stores all the names in the application window Add or Remove Programs are stored in a directory.
  2. Find the name of the application you want to delete. After the meet, click the directory, then select "Delete" from the menu bar "Edit".
You can also other ways.
  1. Right-click the directory.
  2. after a context menu appears, select "Delete".
  3. Before closing the Registry Editor window, press the "F5" on your keyboard to update the contents of the registry.
  4. Without having to restart Windows, open the window of Add or Remove Programs, then look for the name of the original application is difficult to remove. Surely now gone.

Opening folder in new window

As a computer user is often required to work with several files in two or more separate folder. If you have this, we are forced to move between folders in a Windows Explorer window.

When experiencing these conditions, so that the process can go faster, try the following trick.
  1. Run Registry Editor by typing regedit in the menu "Start".
  2. Go to the sub-key "My Computer-HKEY_LOCAL_MACHINE-SOFTWARE-Classes-Directory-shell-".
  3. Click the right mouse button on the right side window, then select "New > Key". Give the name "opennew".
  4. Double click (Default) which are in the right window, then fill it the Value data to "& Open in New Window".
  5. Click "OK".
  6. Click the right mouse button, then select "New> Key".
  7. Give the new key name with the name "command", then click the key to this point you are in the "My Computer-HKEY_LOCAL_LACHINE-SOFTWARE-Classes-Directory-opennew-shell-command".
  8. Fill in the Value Data (Default) to "explorer.exe / e,% 1".
  9. Click "OK".
  10. Close the Registry Editor and restart the PC.
From now on, you can explore the contents of the folder in a new window with ease. Simply right-click the folder in question, then click "Open in New Window".

Tips Limiting Hard Disk Capacity

Tips Limiting Hard Disk CapacityThe available hard disk space is where the easy out. Various types of files and folders are likely to continue growing each time, plus the tendency of the file size growing.

In order to save money, you can use quotas feature of Windows. Basically, this feature works to give hard-disk space quota for each user. To use it, the partition must use the NTFS file system. After that, you can right-click the drive you want to set its quota. Then select the tab "Quota". Check "Enable Quota Management" to activate it. Then check also "Deny disk space to users exceeding quota limit".

Click the "Quota Entries" to regulate how much quota for each user. How, from this window, simply click the name of the user who wants to be given quotas. Then adjust the desired large quotas. For example, here is set quota of 100MB for the guest account with 80MB warning level. That is, if the guest user account to use more than 100MB space, then the window will pop up a warning that disk space is not enough anymore.

Another advantage of the quota, the label that shows the amount of hard disk space available will change depending on the user's quota. Back to the example above, if the guest user account is open My Computer, then the amount of disk space on the screen is only 100MB. So, as if his hard disk capacity is only 100MB, though it did not for it.

The use of quotas would be very helpful, especially for PCs that are used together. With the division of quotas, there is no longer expected to fight hard disk space quota, which in turn facilitate the administration of the system.

Free Software Official OS 5 Curve Javelin 8900

Blackberry Official OS 5 Curve Javelin 8900Now the time that awaited of Blackberry Javelin 8900 users has arrived. Research In Motion (RIM) has officially issued OS 5. Very special because OS 5 just only for Curve Javelin 8900 and not support for Curve other types.

After launching OS 5 for Blackberry Bold some time ago, this is OS 5 for Blackberry Curve 8900 Javelin. This is information from Software 8900 OS 5 Javelin:

Software For BlackBerry® Curve (TM) 8900 Javelin smartphone
BlackBerry Handheld Software v5.0.0.661 (Multilanguage)

Package Version: 5.0.0.661 Consisting of:
Applications: 5.0.0.411
Software Platform: 5.2.0.31

Vodafone Spain
File name: 8900M_PBr5.0.0_rel661_PL5.2.0.31_A5.0.0.411_Vodafone_Spain.exe
File size: 129.99MB

Vodafone DE
File name: 8900M_PBr5.0.0_rel661_PL5.2.0.31_A5.0.0.411_Vodafone_DE.exe
File size: 129.99MB

Optus Mobile Pty Limited
File name: 8900jEastAsia_PBr5.0.0_rel661_PL5.2.0.31_A5.0.0.411_Optus_Mobile_Pty_Limited.exe
File size: 130.57MB

Note: The Software Platform and Blackberry Applications version numbers can be found under Options-About screen on the handheld.

Download Blackberry Official OS 5.0.0.411 for the Blackberry Curve 8900 from:

Automatic Reading Excel Text Data

Automatic Reading Excel Text DataWorking with a spreadsheet is not easy, especially if you are required to maintain the accuracy of the data contained there. Now, with Text to Speech feature, you can make the computer read any text that is inserted into Microsoft Excel to do the verification. Here's how to activate it.
  1. On the "Tools" menu, select "Speech", then click "Show Text to Speech Toolbar".
  2. Select the cell you want to read.
  3. On the toolbar "Text to Speech", click "By Rows" to the computer to read per line, or select 'By Columns' to the computer to read data per column.
  4. Click the "Speak Cells" to the computer to read the cell that you select.
  5. If you find errors in the data, click on "Stop Speaking", and then use the mouse to fix it.
  6. Click the "Speak Cells" to continue.
In order for Excel to read any data you enter into the cell, this trick for trying.
  1. On the "Tools" menu, select "Speech", then click "Show Text to Speech Toolbar".
  2. On the toolbar "Text to Speech", click the "Speak On Enter". Furthermore, every time you enter data in a cell and press Enter, the computer will read the data in these cells.

Use Voice Command In Microsoft Office Programs

Use Voice Command In Microsoft OfficeSame with Windows Media Player program, we can also use a voice command Office or the so-called speech recognition. In addition, you can also dictate or select menus, toolbars, and dialog boxes using voice (in English).

Never use this application? You can do the installation by clicking the "Speech" on the Tools menu in Microsoft Word, or run a Custom installation during installation of Microsoft Office. Once installed, the button will appear in Speech Tools menu in all Microsoft Office programs.

To start using it, you need a microphone connected to the sound card or USB, a computer with a minimum speed of 400MHz or more, at least 128MB RAM or more, and Windows 98 until the latest.

There are two options available modes of this feature, the Voice Command and Dictation. Voice Command mode allows you to give commands in Microsoft Word, for example, to select menus, toolbars, dialog boxes, or to change the format of the document. While to dictate Microsoft Word so you do not need to type them with the keyboard, select Dictation mode. To switch between Voice Command mode and Dictation, just click the button on the Language bar or by saying "voice command" or "dictation" on the microphone.

Examples of speech recognition to change the font via voice:
  1. To open the Font box on the Formatting toolbar, saying: "td".
  2. To change the font of Times New Roman to Verdana, said: "verdana".

Facebook Offering Scholarships

Facebook Offering ScholarshipsCALIFORNIA - Facebook will announce the launch of a new scholarship program. However, this program is limited to computer engineering students across the United States alone.

In addition, these students are also required to work in fields related to social computing and Internet technology lainny. To get the scholarship, students are required to submit a work with the theme "Yeah determined to fight one of the themes offered. To support this program, Facebook itself has launched a new site.

Later students were selected to receive scholarships, Facebook will provide facilities for paying tuition academic year, including tickets and pocket money $ 30 thousand dollars in pocket money, $ 5 thousand to buy a computer, and USD5ribu to pay for travel and conferences.

They will also have the opportunity to be placed as an intern at Facebook's office and paid for next summer. So that was launched by Tech Crunch. Saturday (9/1/2010).

The fifth theme is meant is:
  1. Internet Economics: algorithmic theory relevant online advertising auction.
  2. Cloud Computing: Storage, database, and optimization for distributed computing on a large scale in the environment.
  3. Social Computing: models, models, algorithms and systems in social networks, social media, social search and collaborative environment.
  4. Data Mining and Machine Learning: learning algorithms, feature generation, and effective evaluation methods to produce a model of behavior online and offline.
  5. Systems: Hardware, operating system, runtime, and language support for fast, scalable, efficient data center.
  6. Information Retrieval: the search algorithm, information extraction, answer questions, cross-language and multimedia.
This application is submitted later than the date on February 15, 2010, and winners will be announced on March 29.

Facebook users from Indonesia increased

Facebook users from Indonesia increasedSan Francisco - Predictions of the analysis that says Facebook users outside the U.S. dominated proved true. But once Americans still listed as users of Facebook with the largest percentage.

Inside Facebook was launched through Wednesday (6/1/2010), approximately 70 percent of Facebook users come from outside the United States. Indonesia is the country's largest Facebook to 3 in the world. Indonesia's position under the United States and Turkey with a total user, in this January 2010, reaching 15.3 million. While Turkey reached 16.9 million users.

Figures in both countries is still very much with Facebook users in the United States that reaches more than 100 millions, exactly 102.6 million. This number increased approximately 5 percent compared with last December, which only reached 98.1 million.

If the growth in America is only 5 percent of their users, in contrast with Facebook users in Turkey is only increased approximately 4 percent compared to users in December, reaching 16.3 million. Facebook users in Indonesia alone grew approximately 10 percent compared to the number in December which reached 13.8 million users, or an additional approximately 1.43 million users.

Overall, the growth of Facebook users continues. At the end of the month ago, Facebook users now have reached 350 million, compared to the previous month that only 337 million. This means that there are adding 13 million users in over a month.

Multi Touch In Google Nexus One

Multi Touch In Google Nexus OneThe only thing that prevents Google Nexus One phone call from support multitouch features Apple's patent possible.

Allow me to explain: None of this hardware device to prevent the multitouch as seen by Google's comments this morning at their press conference. When asked if the Nexus One will one day support multitouch, a Google representative said, "We'll consider it." In a word, this means that the hardware is ready for users' pinch and zoom, but the repetition of the current Google software is locked to prohibit multitouch for reasons law. We provide a mobile world of hackers from several days to hack the device - after all, it has been done on the Droid.

Here is a video that shows the multitouch Droid:

And this is the way to achieve. European hackers found a way to jailbreak the device that is less a month after its release. In the United States, the people in AllDroid sussed how to port a web browser from Motorola Milestone - which does not support multitouch - the Droid. Granted, would only serve to hack a web browser, but a significant improvement for those who can live with a brick phone.

Hack requires candidates to have multitouch hero root access to the phone and install and remove certain components. Clearly, these users run the risk of violation of this device and may violate TOS Motorola and void the warranty.

All of the above applies to Droid. However, the same provisions that prevent multitouch device that also applies to Nexus One: It's not about hardware, software just locked. So, we tend to see waiting a few days to see who wants to risk $ 500 + device in an effort to Android mobile through multitouch violating KL-hack.

Apple's involvement with delaying or preventing more and better multitouch devices has become a topic of speculation in the press mobile gadgets since last year, when a group of several key patents issued to certain cues. Since then, several multitouch devices, such as Palm Pre, was released without fanfare law. However, some speculated that Google holds in multitouch for legal reasons.

"I think now more than legal considerations than on technical things, because many phones that run Android has the ability to support multitouch hardware level," wrote Jason Chen of Gizmodo as he played with the device last month.

And Chris Ziegler from Engadget says, "This is still very much a sensitive - but at least we have some confirmation that the limitation of the software alone ... there must be some logic (probably legal logic, but logic still) on the back of the device where the market got. "

What do you think - is this patent issue? Or the software just is not ready for public consumption yet? Better yet, if you have one of these devices, would you jailbreak for multitouch capabilities? Let us know in the comments.

Nexus One From Google Phone Is Superphone

Nexus One From Google Phone Is SuperphoneMOUNTAIN VIEW - Google calls its design the phone that was released with the name as superphone Nexus One, not just smartphones. What are the advantages?

Yes, a number of features is the leader in cell phone range, such as 1 GHz processor made by Qualcomm's Snapdragon. In fact, Nexus One is the first device using Android 2.1, the latest version of the operating system based on open source developed by Google.

Another breakthrough is provided as a mainstay try Nexus One feature is the keyboard-based voice recognition system with voice to text translator. Users do not need to type to write e-mail, SMS, or message on Facebook, but just say it.

The screen also uses AMOLED has a very high contrast ratio, so objects that appear very clear and uninterrupted outside light, such as exposure to sunlight. Like Android devices generally, provided five options wallpapers and five options simultaneously active panel, but this time with three-dimensional view.

In addition, Nexus One is so thin and light. Compare it, he is thinner than a standard pencil and lighter than a standard Swiss pocketknife.

Well, what features are embedded in so-called Nexus One superphone? Here are the details of the specifications:
  • Processor: Qualcomm QSD 8250, 1 GHz
  • Operating system: Android 2.1
  • Memory: 512 MB RAM, 512 MB ROM, and 4GB Micro SD card (can add up to 32 GB)
  • Dimensions: Length 11.9 cm, Width: 5.98 cm, Thickness: 1.15 cm Weight: 130 grams
  • Screen: 3.7 inch widescreen, WVGA AMOLED
  • Camera: 5 megapixels
  • Connectivity: Cellular: UMTS Band 1/4/8 (2100/AWS/900) HSDPA 7.2Mbps HSUPA 2Mbps up to 5.76Mbps GMS / EDGE (850/900, 1800.1900 MHz) Wi-Fi (802.11 a / b / g / n) Bluetooth 2.1 + EDR Bluetooth stereo A2DP receiver AGPS Cell towers and Wi-Fi Digital Compass accelerometer positioning
  • Talk time: 10 hours with 2G, 7 hours with 3G
  • Standby time: 290 hours with 2G, 250 hrs with 3G
  • When the Internet: 5 hours with 3G, 6.5 hours with Wi-Fi Play
  • Video: 7 hours Play
  • Audio: 20 hours

The Cards for backup from PC to BlackBerry

The Cards for backup from PC to BlackBerryHere's a complement for BlackBerry owners. 16GB microSD card to backup important information on your PC or Mac to the BlackBerry.

This process. Just paste it into the microSD card memory slot in your phone, then connect to your PC via USB port. Next wait until the software is complete synchronize new files and make a backup of any changes.

Made from Clickfree card is intended for business people who always mobile, and prefer to carry a BlackBerry than a portable hard drive. If 16GB is not big enough perceived, Clickfree hoping to prepare a larger capacity in the future.

16GB microSD cards will be sold Clickfree begin next April at a price of $89.99. 32GB version expected to be released at a price of $149.99.

Who to Say Kingston Want Acquisitions?

Who to Say Kingston Want  Acquisitions?Kingston's name in the arena of flash memory and is fragrant. Recently was widely heard the news that Kingston is ready to annex the two partners, Panram and Ose. They say all three were doing the negotiations.

Who Panram and Ose? Panram the manufacturer who made DRAM modules to Kingston. While Ose is a manufacturer who had just extended its contract services to handle cards and flash-based drives for customers in the U.S..

However, a direct rebuttal posted by Kingston Technology. News of his intention to acquire its outsourcing partners, Panram and Ose, it was just a rumor.

Kingston said that they just like to plan to add (capacity) to outsource its Panram and Ose than developing capacity in-house assembly of his. Kingston also has officially denied that this was a precursor of the second acquisition step that supplier.

MSI's e-Book Has Two Screen

MSI's e-Book Has Two ScreenLAS VEGAS - Notebook with dual screen? Long been heralded ah. However, MSI was the first to show real working units.

And it's exactly what we want. Double screen, there are two aliases. Each measuring 10 ". The screen is also touch screen with virtual keyboard exclusive.

MSI calls this instrumentalities as an e-reader. But this is actually a netbook. For entrenched inside Intel Atom Z series and the operating system Windows 7 Home Premium. WLAN and SSD is also embedded in this device by MSI.

The easy way to edit photos with Photoshop

The easy way to edit photos with PhotoshopThe easy way to edit photos with Photoshop

Many good things that affect the very least a photo: from the point of view, the object, to the effect. But the most striking is the quality of color and lighting. If by any chance the photos you take experienced shortfalls in this case, do not have to be disappointed. There are easy ways to outsmart. Take advantage of the software only if digital.

Is Adobe Photoshop - photo retouching software that is popular with graphics and photography actors - who I select. Although the software is classified as a pro class, there are many compact facility that you can use to improve the image quickly and easily, even for ordinary users though. Adobe Photoshop CS4, final version, provides many facilities to meet those needs. Live clack-click of the mouse for a while, your photos will look more beautiful.

Want try? Follow these steps.
  1. The first stage, consider first picture if you want, where faults. Photos appear dim, the color is opaque, much less detail the object? Let's fix it.
  2. The first and easiest is to use the auto adjustment. How, click [Image]> [Auto Tones]. Take advantage also [Auto Contrast] and [Auto Color].
  3. If the result is less satisfactory, let one by one we Oprek each component image. First, the lighting. Click [Image]> [Adjustment]> [Levels]. Wait until the Levels dialog box appears.
  4. If the images look dark, drag the slider bar to the left white so images look bright. Do not forget to move the slider a little gray (midtones) to the right to maintain the image detail. If the images are too bright, move the slide bar to the right black. If so, click [OK].
  5. Another way to maintain the detail and lighting is set by adjusting the contrast. Click [Image]> [Adjustment]> [Brightness / Contrast ...]. In the dialog box that appears, move the slide bar "Brightness" to the right to increase the level of the photo caption, and then followed by "Contrast" to prevent the image detail is lost. If so, click [OK].
  6. Improve the color and lighting can be done simultaneously with Curve facilities. Click [Image]> [Adjustment]> [Curve ...]. In Curve dialog box, available from a number of facilities to improve the image instantly. One is the [Auto] that can be used to improve the quality of lighting automatically.
  7. In this box is also available rapid setting (preset) for a number of output results. For example, if you want the image has the contrast level is rather high, simply click the drop-down menu "Preset", then select [Increase Contrast].
  8. To apply the settings manually set the color curves in the middle of the box. Click one point on the curve line, then drag up or down. For example, in the position [RGB], if the curve is clicked at the bottom left and then pulled down, then the picture will turn dark with high contrast levels. To raise the level of brightness, click on the top right point and drag upward.
  9. You can do this step for each color channel (for RGB, the image consists of channel Red, Green, and Blue). If you want to raise the red element in the photo, click the channel [Red], then click-drag the curve to achieve the desired color. Please imaginination with color photos here. Click [OK] to close the box.
  10. If the color variation in your images look a lot less due to the quality of the camera sensor, color by clicking ragamkan [Image]> [Adjustment]> [Hue & Saturation ...]. In the box that appears, move the "Saturation" to the right to increase the variety and intensity of colors in the image.
  11. If a particular color that you want to raise its intensity, click the menu marked "Master", and select the desired color. Drag the slide bar to the right "Saturation" to the colors you choose are increasingly "hard". When done, click [OK].
  12. The latter, also to regulate the lighting, use [Image]> [Adjustment]> [Exposure ...]. Manage the three existing slide bar to adjust the light-dark photo. Click [OK]. All of the above tools is an effective tool to enhance your photos.

Create an image skull like Ghost Rider

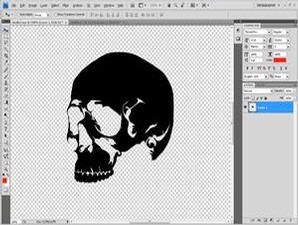
Create an image skull like Ghost RiderCreate an image skull like Ghost RiderThe skull was burning like effects in science fiction movies is the theme this time digital imaging. Although a bit smelly horror, your results are guaranteed is very cool. How to make it not too difficult.

To create a cool effect of the skull on fire, you just need a few tools in Adobe Photoshop CS4. Smudge tool, plus a refined gradient tool and a little movement with the pointer like a painting. In addition, also provide images of the skull that can be made with a vector application such as CorelDRAW or Adobe Illustrator. No need to create a complex picture and details, a simple enough way skulls skull silhouette images presented here. Do not forget, is also drawing fire prepared a black background.
Was ready to start? Let's play.
  1. Prepare a simple skull image as I making here. You can make it with another style, you know. Make a simple drawing, such as the silhouette. Use a black or white color as the base.
  2. Prepare the work area by drawing the desired size. Give the black color in the work area by pressing [Shift] + [F5] on your keyboard. Continue to choose [Black] on the menu "Use". If so, click [OK].
  3. Choose red and black, in the "Foreground color" and "Background color" in the toolbox. Select [Gradient Tool], then [Foreground to Background] and [Radial Gradient] on the menu in the toolbar gradation setting.
  4. Click-drag the pointer from the middle of the document outside the work area to appear red circle gradations. Continue with importing images into the work area of the skull. Give the name of the skull on the drawing layer.
  5. Press [Ctrl], then click on the layer "Skull" to appear around the image selection. Click the gradient tool again with fashion "Foreground to Background, but with yellow and red. Click-drag the pointer in the image of the skull.
  6. Press [Ctrl] + [D] to remove the selection. Enter the image of fire, and named the "Api1". Lower the value of this layer opacity to 80%. Continue by pressing [Ctrl] and click on the layer "Skull" again.
  7. Click the layer "Api1", then press [Shift] + [Ctrl] + [I]. Press the [Delete], so that the image of fire to form a skull image. To look dikobari fire, click [Smudge Tool]. Select the type of brush "Chalk" or "carcoal" in the menu "Brush".
  8. Press [Ctrl] + [D]. Asleep on the image layer "Api1" to form the blaze. Use a brush size variations. To increase or decrease the brush, use slidebar "Master Diameter" in the menu "Brush".
  9. Enter another fire images, and named the layer "Api2". Try drawing a lick or flames. Change the blending mode to [Screen] and position it at the top of the skull. Change the size to fit the skull.
  10. Press [Ctrl] + [T] until the box appears around the second fire. Press [Ctrl], then click-drag one corner of the box to adjust the form of fire with the skull. Continue with the other corner. If so, press [Enter] on the keyboard.
  11. The second fire was fast asleep with the Smudge tool as the previous step for forming the blaze. To form a dark-light illumination of the skull, use the [Dodge Tool] or [Burn Tool], and fell asleep on the necessary parts.
  12. Make sparks with [Brush Tool] type of hard red and small. Create a new layer and named "spark". Pulaskan on the outside of the skull, and then wipe the spark Smudge Tool.
  13. Combine all the layers. Click [Layer]> [Flatten Image]. To reinforce the color of fire, press [Ctrl] + [M]. Use the box "Curve" to confirm color. Use the preset [Linear Contrast] or [Strong Contrast], then click [OK].

The more beautiful with Shadow Effect

The more beautiful with Shadow EffectThe more beautiful with Shadow Effect

Consider carefully a number of product advertising, particularly print advertising electronic products, such as gadgets, mobile phones, and the like. Form of what the product images show up there?

The images are created in such a way that seemed luxurious and beautiful. And the most convenient features is the impression of a reflection effect. Consider it, a number of product photos, though looks simple or without additional ornamentation, yet still keep looking good thanks to the effect of this reflection.

Reflection effects can be created in two ways, namely by generating reflection photographed (using a field that can bring such a good image with acrylic), or digitally if so reflected.

For those of you who do not have adequate equipment to create a reflection effect when taking pictures, if the digital way is worth a try. In fact, you can create this impression with ease using any imaging software. In this tutorial, I use Adobe Photoshop CS4. If you use other software, no need to be discouraged. Stages practice more or less the same, really.

It's ready to try? Let us begin.
  1. Open the image to be formed products reflections. Make sure you take a photo with the background (background) plain. If not innocent, remove the existing background by selecting an object, perform inverse, then fill the background with a plain color.
  2. Make sure your images have the space to form a reflection. If not, dilate the image by clicking on the canvas [Image]> [Canvas Size ...], or press [Alt] + [Ctrl] + [C]. In the Canvas Size box, add the photos to be more wide and long.
  3. For example the canvas size of your image is 8cm x 10cm. To create a reflection, add the length of the image to fill the bottom with a number of around 15-20 cm for the "Height", and select the arrow to the top of the "Anchor" to the canvas extends downward.
  4. Add the broad canvas photos on the "Width" if necessary. For wide, no need to specify an anchor to a proportional increase space on either side of the canvas. Select the color matches the color of the canvas background image on the "Canvas extension color:". Click [OK].
  5. Now the main image by double clicking the layer "Background", then press the [Ctrl] + [A], or click on [Layer]> [Duplicate Layer ...]. Click [OK] on the notification box that appears. Because the condition is always inverted reflection of the position of the main image, you must turn it over.
  6. Click the layer duplication, and then click [Edit]> [transform]> [Flip Vertical]. Duplicate layer will be reversed vertically. Change the layer blending mode via the drop-down menu above the Layer dialog box, it becomes [Multiply]. Shear layer to reflect directly beneath the main object.
  7. Reflection does not bring the main object intact. Generally, there are gradations in the reflection impression. To make it, use the gradient tool facilities. First, create a first mask layer by clicking layer duplication, then click on [Layer]> [Layer Mask]> [Reveal All].
  8. After the mask layer is formed, click [Gradient Tool]. Make sure the color is selected in the two boxes and color-foreground-background color is black and white. Choose mode [Black to Transparant] on the menu "Gradient Editor" on the top, then use the gradient type [Linear].
  9. Click drag the gradient tool from the bottom up until close to the main object image position on the layer mask on the duplicated layer. Look, now the object on the layer duplication appeared as vague. So do not look too sharp, a little lower layer opacity value duplication.
  10. To resemble a reflection-which usually appear not too sharp and-paste a bit vague blur effect. Click the layer duplication, not a layer mask, then click [Filter]> [Blur]> [Gaussian Blur ...]. Opaque few pictures a few points, then click [OK]. Reflection has become.
TIPS: Reflections on the Text
Effect of reflection you can also apply in the text to look more beautiful. The way not much different from the tutorial above. Fun, the text does not need to be picture-in-rasterized process so the gradient (gradient) can be applied.

To be more unique, you can add a reflection effect on the text, such as filter "Ocean Ripple" (reflected in the water bath), or filter "Glass" (reflected in the glass). For the application of filters, text or images should be made dirasterisasi. Way, stay right-click the text layer, then select [Rasterize Type].

3-dimensional effect with photoshop

3-dimensional effect with photoshopAdobe Photoshop can be used not only to manipulate photos or images. In CS4 Extended editions, this application also provides facility to create three-dimensional images (3D). Although simple, the result was quite ciamik and practical use.

Some form of ready-made 3D, starting from the form of boxes, balls, donuts, so you can use canned. Just choose the image, click a few options, 3D images can be instantly created.

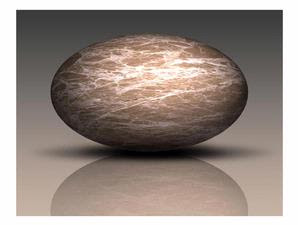
For example, I will invite you make a marble tiles (marble). Changing the texture of ceramic into a ball you can do with little steps.

It's ready to try? Let us start.
  1. Create a new image document. The size and resolution-free. If you later want to print, choose a resolution of 300 pixels / inch. If so, prepare a photo or image texture will be applied to the 3D image.
  2. I obtain this marble texture images from the Internet. With him, PCplus will make a marble from the marble. Enter the drawing by clicking [File]> [Place ...]. Find and select the image that is used, then click [Place].
  3. After the picture comes in, press [Enter]. 3D shape options available in the [3D]> [New Shape From Layer]. Here is some form of 3D that can be used directly, starting form the cube, ball, until the can of soda.
  4. To conjure the image texture of marble into a marble ball, click [3D]> [New Shape From Layer]> [Sphere]. Wait a while until the drawing ball textured 3D images of your choice appears.
  5. Now two 3D tools in the toolbox can be used already. To process the image, use the tool in the ranks of "3D Rotate Tool". This feature consists of five tools, the 3D Rotate Tool (serves to rotate the 3D shape in all directions), 3D Roll Tool (rotate 3D shapes in a single direction), 3D Pan Tool (change or shift the position of 3D), 3D Slide Tool ( change the position and size of 3D shapes), and 3D Scale Tool (change the size of the 3D shape).
  6. In order to appear more realistic, set lighting 3D shapes you create. Take advantage of 3D panel to manage the image. To bring it up, click [Window]> [3D]. To add light effects, click the tab [Filter: By Lights] with bulb icon.
  7. There are three types of lighting provided, namely Point, Spot, and Infinite. Usually, the lighting by default is Infinite. Now, to create new lighting, click the button on the sheet berikon panel "3D", then select the type of lighting needed.
  8. A new light layer will appear. Click the new layer, and set the intensity of the lighting via the "Intensity". You can set the fall of light using an existing tool in the Properties panel layers of light.
TIPS: The more realistic more good
Arange reflection can bounce back to working on more realistic appearance. Change the 3D layer into the image by right-clicking the layer in the panel "Layers", then select [Rasterize]. Duplicate the layer containing the 3D images by clicking on the layer "Background", then press the [Ctrl] + [J]. Click [OK] in the notification box that appears.

Because the condition is always inverted reflection of the position of the main image, you must rotate. Click the layer duplication, and then click [Edit]> [transform]> [Flip Vertical]. If the image requested to be changed into "Smart Layer", just click [Yes]. Duplicate layer will be reversed vertically. Change the layer blending mode-through via the drop-down menu on the Layer dialog box, the [Multiply]. Shear layer until the reflections are just below the main object.

Reflection will not bring the main object intact. Generally, there are gradations in the reflection impression. To make it, use the gradient tool facilities. First, create a first mask layer by clicking layer duplication, then click on [Layer]> [Layer Mask]> [Reveal All].

Once formed layer mask, click [Gradient Tool]. Make sure the color is selected in the two boxes and color-foreground-background color is black and white. Choose mode [Black to Transparant] on the menu "Gradient Editor" on the top, then use the gradient type [Linear].

Click drag the gradient tool from the bottom up on the layer mask on the duplicated layer to a position near the main object image. Look, now the object on the layer duplication seemed vague. So not too sharp, a little lower layer opacity value duplication.

Make a shadow fell below marbles using [Elliptical Marquee Tool]. Make an oval in a new layer below the layer marbles, black color, then give the filter [filter]> [Blur]> [Motion Blur]. Select the "Angle" 0 degrees, then the value of "Distance" maximum. Click [OK]. See the results.

Lenovo IdeaCentre C300: Beautiful Classic Style

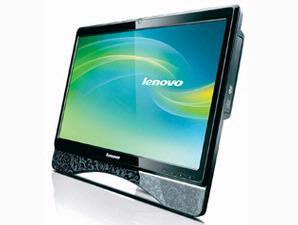
Lenovo IdeaCentre C300: Beautiful Classic StyleWith a beautiful design and complete facilities, Lenovo IdeaCentre A600 is an ideal representation of a PC AiO. Not long ago, the vendor re-release of his newest family IdeaCentre labeled C300. Can be traced from its name if this product is set as a downgraded version of the A600. However, the design aspect remains a mainstay of Lenovo. This time they gave interface attraction with classical motive frame.

Class differences with the "brother" immediately apparent when we looked in the hardware specifications. To suppress the price, Lenovo uses Intel's Atom processor. But instead of using a type of N270 or N280 is actually intended for the netbook, C300 carrying a targeted N330 Intel for nettop. Naturally, if the performance was quite rushed C300 compared to other PC level AiO. Especially if you just used for standard computing activities.

Shown with 20-inch screen, C300 is well suited to satisfy the users of the multimedia side. The availability of an internal DVD drive into an advantage compared to C300 class competitors who generally only provide an external optical device.

But when tested, the ability to play HD video files, not as smooth as the way of hope. In some sections, the resulting picture somewhat broken. It does not matter if the play is a standard multimedia files such as AVI, WMV, and MP4.

Intrigued with its 3D performance, we played the game Doom 3 with the C300. The result? It turned out pretty good. Much more smoothly than when playing HD video.

Lenovo IdeaCentre C300 offers complete connectivity options. There are 6 USB ports, 1 port PS / 2 (for mouse), FireWire port, LAN, memory card reader 6-in-1, and also Wi-Fi facilities. With the range prince competitive prices in a number of U.S. $ 599, C300 worthy promoted as a leader among AiO various mid-level PCs.

Plus: beautiful design; use Atom N330; there is an internal DVD Writer; full connectivity
Minus: Lack of HD video plays okay; keyboard dirty easily; back less flexible

TEST SCORE
Performance: 3.8
Feature: 4
Ease: 4
Price: 4
TOTAL SCORE: 3.94

Test Results
SysMark 2004: 47
PCMark 2005: 2740
3DMark 2001: 2413
Encoding audio: 9 minutes 37 seconds
Encoding video: 32 minutes 42 seconds
Cinebench: 1561

Lenovo IdeaCentre SPECIFICATION C300
Processor: Intel Atom 330 1.6 GHz
Chipset: Intel Lakeport-G i945GC
Memory: 1 GB DDR2 GG7 MHz
Graphics Card: ATI Mobility Radeon X4530
HDD: 160 GB, up to 640 GB
Optical drive: DVD writer
Sound card: Realtek ALC662
OS: Windows XP SP2
Facilities: 6 USB ports, 1 FireWire port, LAN, 802.11b / g WiFi, memory card reader, audio ports, 1.3 MP webcam + mic, speaker, PS / 2 keyboard, USB mouse
Monitor: 20 "(16:9 ratio)
Dimensions: 49x36x55 cm
Weight: 6.4 kg
Warranty: 1 year
Price range: U.S. $ 599
Review QWERTY Phone From Motorola Q8

Review QWERTY Phone From Motorola Q8Review QWERTY Phone Motorola Q8

The newest QWERY phone from Motorola is Motorola Moto Q8. Beauty, power and intelligence collide with the Motorola MOTO Q8 – an elegant all-in-one device that merges business with pleasure. Boasting a full QWERTY keyboard, the feature-rich MOTO Q8 keeps your life with you in one sleek device by combining powerful business productivity applications via Windows Mobile with multimedia entertainment.

From stereo Bluetooth wireless technology, astounding audio sound and a 1.3 megapixel camera to blazing fast Internet connections, convenient WiFi through optional miniSDIO card connectivity and the ability to view and edit Microsoft Office documents from anywhere in the world - there’s no need to compromise when you can have it all in one device. The below is the technical data of Motorola Q8 Smarthphones.

Specification
- GSM Non 3G
- OS Windows Mobile 6 Standard
- Resolusi QVGA Landscape
- QWERTY Keyboard
- MiniSD Card Support up to 2Gb
- Bluetooth, GPRS, EDGE
- camera 1,3MP
- Mini USB for charging and data connection
- OS: Documents To Go
- Additional Accesories : MiniSDIO for WiFi and TV Tuner

Review Mobile Cell Phone Motorola W230

Review Mobile Cell Phone Motorola W230Review Mobile Cell Phone Motorola W230

Motorola mobile has announced an upgrade to the Motorola W230, called the W388. It is an incremental upgrade to the low end phone, now sporting a VGA camera and a little bit more memory. The features of Motorola W230 is Radio Stereo FM radio with RDS, Languages African languages, Hinglish, Bengali, Tamil and more.

The weakness of Motorola W230 cell phone is not 3G supported an not have camera. The below is detail of technical data from Motorola W230 mobile cell phone.

Specification
GENERAL
2G Network GSM 900 / 1800
GSM 850 / 1900 - US version

SIZE
Dimensions 110 x 45 x 14.7 mm
Weight 80 g

DISPLAY
Type CSTN, 65K colors
Size 128 x 128 pixels, 1.6 inches

SOUND
Alert types Vibration; Downloadable polyphonic, MP3 ringtones
Speakerphone Yes

MEMORY
Phonebook 500 entries
Call records 10 dialed, 10 received, 10 missed calls
Card slot microSD (TransFlash), up to 2 GB supported
- 500 SMS messages

DATA
GPRS Class 10 (4+1/3+2 slots), 32 - 48 kbps
HSCSD No
EDGE No
3G No
WLAN No
Bluetooth No
Infrared port No
USB Yes, v1.1

CAMERA
No

FEATURES
Messaging SMS, EMS, MMS
Browser WAP 2.0/xHTML
Radio Stereo FM radio with RDS
Games Yes
Colors lustrous silver, dark titanium gray
Languages African languages, Hinglish, Bengali, Tamil
GPS No
Java No
- MP3 player (iMelody,MIDI,MP3,AMR formats)
- T9
- Calculator
- Stopwatch

BATTERY
Standard battery, Li-Ion 940 mAh (BQ50)
Stand-by Up to 450 h
Talk time Up to 9 h

Review Mobile Cell Phone From Motorola ZN200

Review Mobile Cell Phone From Motorola ZN200Review Mobile Cell Phone Motorola ZN200

The Motorola ZN200 also features an MP3 player and FM radio so you can enjoy your favorite music anytime, anywhere. Transfer songs from your PC with USB 2.0 FS drag and drop support or look for downloads via the Motorola ZN200’s GPRS web browsing capabilities, and stay connected whenever you like with the ZN200’s web browsing capabilities.

Alternatively, check out the latest news or download MP3 ring tones and wallpapers to personalize your mobile phone or enjoy the challenge of the pre-loaded games. The Motorola ZN200 sports a classy, premium look that comes in two colors, each with chrome-plated keys and medallions on the front and high-gloss metallic detail patterns on the back. With multimedia, web browsing, a music player and CrystalTalk technology, you’re always connected to the people, music, and experiences that you are passionate about.

Specification
GENERAL
2G Network GSM 850 / 900 / 1800 / 1900

SIZE
Dimensions 105 x 47 x 15.9 mm
Weight 115 g

DISPLAY
Type TFT, 256K colors
Size 176 x 220 pixels, 1.9 inches
- ModeShift morphing keypad

SOUND
Alert types Vibration; Downloadable polyphonic ringtones
Speakerphone Yes
MEMORY Phonebook 2000 entries, Photocall
Call records 20 dialed, 20 received, 20 missed calls
Internal 30 MB
Card slot microSD (TransFlash), up to 2 GB

DATA
GPRS Class 12 (4+1/3+2/2+3/1+4 slots), 32 - 48 kbps
HSCSD No
EDGE Class 12
3G No
WLAN No
Bluetooth Yes, v2.0 with A2DP
Infrared port No
USB Yes, v2.0

CAMERA
Primary 2 MP, 1600x1200 pixels
Video Yes
Secondary No

FEATURES
Messaging SMS, MMS, Email
Browser WAP 2.0/xHTML, HTML
Radio FM radio with RDS
Games Yes
Colors Licorice, Pink
GPS No
Java Yes, MIDP 2.0
- MP3/WMA/eAAC+ player
- MotoID music recognition
- CrystalTalk Technology
- Organizer
- Voice memo

BATTERY
Standard battery, Li-Ion (BC50)
Stand-by Up to 340 h
Talk time Up to 8 h 30 min

Review Smart Phone Motorola Q11

Review Smart Phone Motorola Q11Review Smart Phone Motorola Q11

The new version smartphone that issued from Motorola mobile phone is Motorola Q11 type. This smartphone use QWERTY keypad. The size of Motorola Q11 is 117 x 64 x 11.7 mm, 85 cc and weight 115 g. The display color from Motorola Q11 is 65K colors with TFT type. The other features from Motorola Q11 is primary camera 3.15 MP, OS Microsoft Windows Mobile 6.1 Standard, CPU Freescale ARM 7 LTE processor, Browser WAP 2.2/HTML (Pocket IE6) and more.

The weakness of Motorola Q11 cell phone is not support 3G service, don't have radio and secondary camera. The below is the detail of technical data from Motorola Q11 smart phone.

Specification
GENERAL
2G Network GSM 850 / 900 / 1800 / 1900

SIZE
Dimensions 117 x 64 x 11.7 mm, 85 cc
Weight 115 g

DISPLAY
Type TFT, 65K colors
Size 320 x 240 pixels, 2.4 inches
- Full QWERTY keyboard
- 5-way navigation button
- Downloadable wallpaper and screensavers

SOUND
Alert types Vibration; Polyphonic, MP3 ringtones
Speakerphone Yes

MEMORY
Phonebook Practically unlimited entries and fields, Photocall
Call records Practically unlimited
Internal 64 MB RAM, 128 MB Flash
Card slot microSD (TransFlash), up to 16GB

DATA
GPRS Class 10 (4+1/3+2 slots), 32 - 48 kbps
HSCSD Yes
EDGE Class 10, 236.8 kbps
3G No
WLAN Wi-Fi 802.11 b/g
Bluetooth Yes, v2.1 with A2DP
Infrared port No
USB Yes, v1.1 microUSB

CAMERA
Primary 3.15 MP, 2048x1536 pixels, LED flash
Video Yes, 15fps
Secondary No

FEATURES
OS Microsoft Windows Mobile 6.1 Standard
CPU Freescale ARM 7 LTE processor
Messaging SMS (threaded view), MMS, Email, Push Email, IM
Browser WAP 2.2/HTML (Pocket IE6)
Radio No
Games Yes + downloadable
Colors Black
GPS Yes, with A-GPS support
Java Yes, MIDP 2.0
- MP3/AAC+/WAV/WMA music player
- MPEG4/3gp/MWV/H.264 video player
- Voice memo/dial
- T9

BATTERY
Standard battery, Li-Ion 1170 mAh
Stand-by Up to 195 h
Talk time Up to 7 h 30 min

Review Mobile Cell Phone Motorola W231

Review Mobile Cell Phone Motorola W231Review Mobile Cell Phone Motorola W231

The newest mobile phone that issued from Motorola mobile is Motorola W231 type. The dimension of Motorola W231 is 108 x 44 x 14.9 mm with weight 78 g. The weakness of this mobile cell phone is not have camera and 3G.

The endurance of Motorola W231 mobile cell phone about 310 h for standby and 7 h for talk time. The other features from Motorola W231 is radio Stereo FM radio, browser WAP 2.0/xHTML, MP3 player. The below is detail of technical data from Motorola W231.

Specification
GENERAL
2G Network GSM 900 / 1800

SIZE
Dimensions 108 x 44 x 14.9 mm
Weight 78 g

DISPLAY
Type TFT, 65K colors
Size 128 x 128 pixels, 1.6 inches

SOUND
Alert types Vibration; Downloadable polyphonic, MP3 ringtones
Speakerphone Yes
- 3.5 mm audio jack

MEMORY
Phonebook 500 entries
Call records 10 dialed, 10 received, 10 missed calls
Card slot microSD (TransFlash), up to 1 GB supported

DATA
GPRS Class 10 (4+1/3+2 slots), 32 - 48 kbps
HSCSD No
EDGE No
3G No
WLAN No
Bluetooth No
Infrared port No
USB Yes, v1.1

CAMERA
No

FEATURES
SMS(750), MMS, Email
Browser WAP 2.0/xHTML
Radio Stereo FM radio
Games Yes
Colors Red
GPS No
Java
- MP3 player
- T9
- Organizer
- Voice memo

BATTERY
Standard battery, Li-Ion
Stand-by Up to 310 h
Talk time Up to 7 h 30 min

Review Motorola ZN5

Review Motorola ZN5Review of Smarthphone Motorola ZN5

Motorola ZN5 is one of smartphones from Motorola mobile. The size of Motorola ZN5 is 118 x 50.5 x 12-16 mm with weight about 114 g. The Motorola ZN5 have primary 5 MP for camera. The display color is 256K with TFT type.

The other features of Motorola ZN5 mobile phone is use operating system Linux, CPU Freescale 500 MHz processor, Messaging SMS, MMS, Email, Instant Messaging, Crystal Talk Technology and more. The below is more detail and specification of Motorola ZN5 mobile phone.

Specification
GENERAL
2G Network GSM 850 / 900 / 1800 / 1900

SIZE
Dimensions 118 x 50.5 x 12-16 mm
Weight 114 g

DISPLAY
Type TFT, 256K colors
Size 240 x 320 pixels, 2.4 inches
- ModeShift morphing keypad

SOUND
Alert types Vibration; Downloadable polyphonic, MP3 ringtones
Speakerphone Yes
- 3.5 mm audio jack

MEMORY
Phonebook 2000 entries, Photocall
Call records 20 dialed, 20 received, 20 missed calls
Internal 350 MB
Card slot microSD (TransFlash), up to 4 GB, buy memory

DATA
GPRS Class 12 (4+1/3+2/2+3/1+4 slots), 32 - 48 kbps
HSCSD No
EDGE Class 12
3G No
WLAN Wi-Fi 802.11 b/g/i
Bluetooth Yes, v2.0 with A2DP
Infrared port No
USB Yes, v2.0

CAMERA
Primary 5 MP, 2560х1920 pixels, autofocus, xenon flash
Video Yes, 15fps
Secondary No

FEATURES
OS Linux
CPU Freescale 500 MHz processor
Messaging SMS, MMS, Email, Instant Messaging
Browser WAP 2.0/xHTML, HTML
Radio FM radio
Games Yes
Colors Grey
GPS No
Java Yes, MIDP 2.0
- MP3/WMA/eAAC+ player
- Crystal Talk Technology
- TV-out
- Organizer
- Voice dial
- Voice memo

BATTERY
Standard battery, Li-Ion 950 mAh (BX50)
Stand-by Up to 580 h
Talk time Up to 9 h 30 min