 Formerly, a collection of regular photographs stored in photo albums, which then potentially moldy because of the time consumed. But that's past. Now is the era of digital albums that have been equipped with numerous features for managing digital photos.
Digital album, whose name would require a computer to open it. Without it, almost impossible to display the entire collection of digital photos with ease. Meanwhile, to display a collection of images to another device, you must first convert the digital images into slideshow.
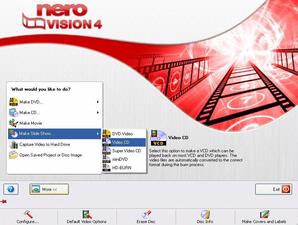
Such conversions can be done in many ways, one with Nero Vision 4. This application is bundled with Nero installer package. With it, you can arrange pictures slideshow of the files, digital camera, or scanner into a DVD easily and quickly.
Here's the steps to produce:
- Nero Vision program execution by clicking 4 Start menu> All programs> Nero> Nero 9> Nero Vision.
- Nero Vision program, click the menu Make a Slide Show> DVD-Video.
- Find the picture you want to enter into the storyboard. To take a picture from a folder, you can click the Browse button for Media> Browse and Add to Project. To take a picture from a digital camera or scanner, click the Import TWAIN> Acquire Image.
- Perform drag and drop images on the timeline to set the order of photos.
- Set the duration of each picture by pressing the Settings icon Duration. After that, fill in the Picture visibility time in seconds and check the "Apply to existing pictures".
- Click the right mouse button on the box in between two pictures, then select "Apply to All Tansition Random Tansition Fields".
- Click Next> Next.
- Design the menu as you wish. To disable this menu, select "Do not create a menu" Menus from the combo box to use.
- Click Next> Next.
- Click the Burn to disc manufacturing process immediately.
0 komentar:
Post a Comment